
These Ukrainian pickled tomatoes are so easy to make and delicious! Usually, very large batches are made for the winter. This is a faster recipe. You put them in the fridge and enjoy them a week or two later.
This recipe is very approximate. It is for however many of your tomatoes fit in a 32 oz mason jar. Then, however much water then is needed to fill the mason jar to the top.
These are often enjoyed by themselves, while drinking alcohol as a chaser (think pickleback!), as a pallet cleanser between appetizers, or with a main dish like buckwheat.

The sealing method here is also questionable by US standards. It is commonly practiced in Ukraine. For this reason, just make sure not to leave out the jar for over 24 hours. Pop it in the fridge after around 23-hours. It is safe to consume in the fridge for a few months even with an improper seal. Feel free to reach out with any questions!
These are some notes before you start pickling these Ukrainian tomatoes:
Ukrainian pickled tomatoes are usually made with tomatoes about the size of Campari or small Roma. It could be made with larger tomatoes, but they will take longer to “pickle” so that is why I use small Campari tomatoes. Cherry or grape tomatoes will have a different taste, so stick with small “regular” tomatoes.
The size of tomatoes is very important, if you use bigger tomatoes, increase the time in the fridge before opening.
Adding leaves from a blackberry bush, raspberry bush, or currant bush adds an amazing flavor. They add the most authentic taste. Don’t skip this step unless you have to! If you can’t find these bushes around you, try to find the dried leaves.
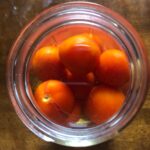
Ukrainian Pickled Tomatoes
Ingredients
Mason Jar Packing
- 1 lb campari tomatoes (other tomatoes could be used, please see the note. This is around one lb, mainly, how many fit in the 32oz mason jar).
- 1 sprig dill (should have a large stem, the stem is the most important part and adds the most flavor)
- 25 peppercorns (black or blend) (It's about 1/2 tsp, I used a blend of green, white, red, and black peppercorns, but black will do just fine)
- 1 clove garlic (peeled)
- 1/2 large bay leaf (or one small)
- 1/2 inch dry red chili (I cut off the tip of the chili)
- 3 blackberry, raspberry, or currant leaves (optional, but preferred. Dry or fresh).
Brine
- 1/2 liter boiled water (may have some left over after filling the jar)
- 1/2 tbsp salt
- 1 tbsp white sugar
- 1/4 cup 5% white vinegar
Instructions
Mason Jar Packing
- Clean and sterilize your jar! I used an instant pot and this handy guide. But any technique that you choose or usually practice is fine. Just make sure the jar is clean and sterile before moving on to the next step.
- In the meantime boil the water. I use an electric kettle, so it is super quick.
- At the bottom of the mason jar, put the sprig of dill, bay leaf, peppercorns, garlic, chili pepper, and blackberry leaves.

- Wash the tomatoes and make sure they are clean. Put them into the mason jar.
- Pour boiling hot water over the tomatoes to the top of the jar and let stand for 5 minutes. If your tomatoes are on the bigger side, I suggest up to 15 minutes.

Brine
- Pour the water in the jar into a pot and bring to a boil. Add the salt and sugar. Boil until everything is dissolved.
- Take off heat and mix in the vinegar.
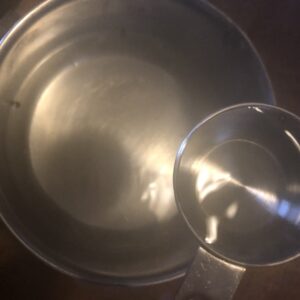
- Once again, pour the water back into the mason jar. It is okay if it doesn't all fit!
- Seal and flip upside down in a dark corner covered by a blanket overnight. This step is very important! It will slow down the cooling of the jar, so the tomatoes will process. The pressure of the upside down jar will allow it to seal. The main thing here is in Ukraine, you have different sealing equipment, so this seal might not be perfect. For this reason, once the jar is cooled (overnight, less than 24 hours), pop it in the fridge.

- Leave in the fridge for 1 week if small tomatoes, and 2 weeks if the tomatoes are larger. Break the seal after 2 weeks and enjoy!
Leave a Reply